
Steps to Building Your Home from the Ground Up
STEP 1 – FIGURING OUT NEIGHBORHOODS
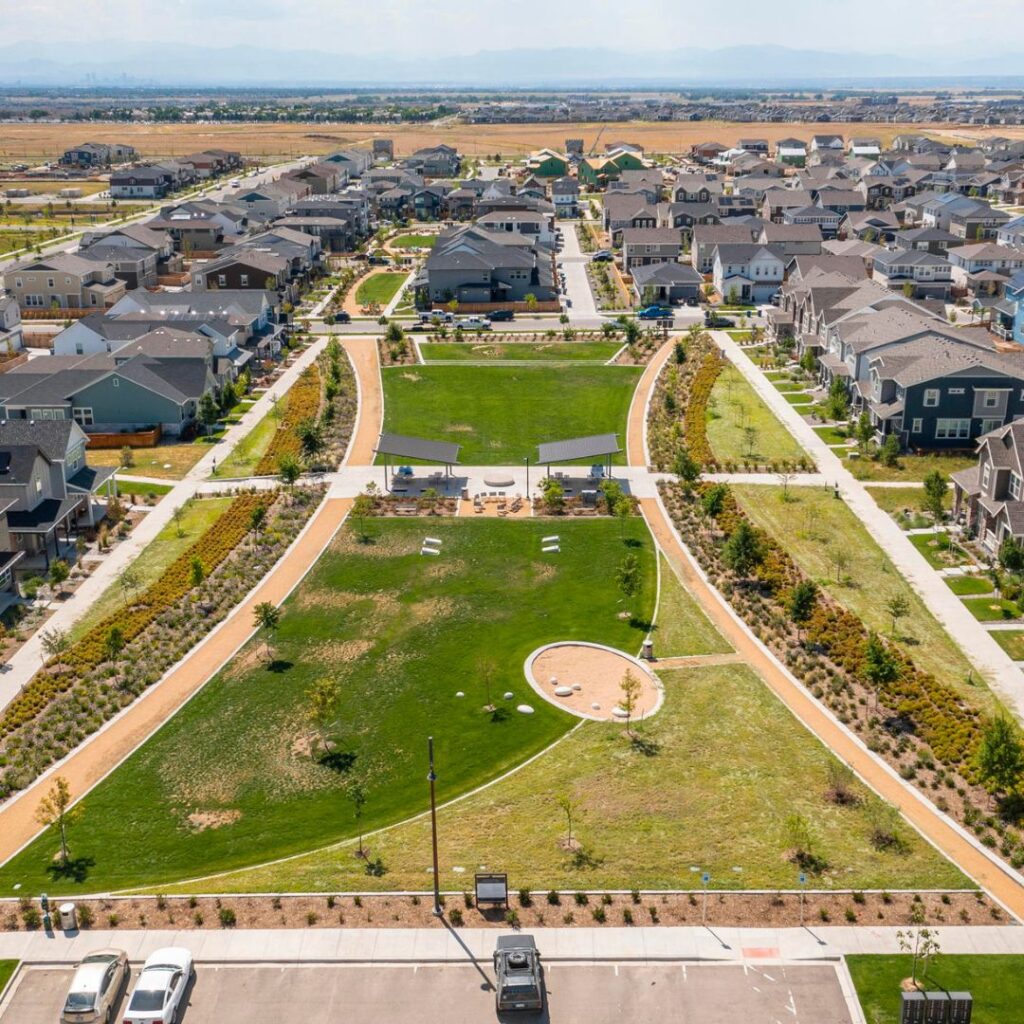
Whether you’re already immersed in Denver’s lively atmosphere or gearing up for an exhilarating move, finding your ideal spot is a crucial step on this thrilling journey! From fantastic neighborhood perks and proximity to major workplaces, to top-notch schools and a plethora of amenities, there’s a lot to take in. Fortunately for you, having a Realtor by your side is like having a personal guide dedicated to helping you achieve your housing goals. Realtors serve as your passport to exploring diverse neighborhoods and housing options, guiding you straight to the doorstep of your fantastic new community! Delving into and exploring neighborhoods is honestly one of my favorite aspects of being a Realtor, and I’d love to assist you in discovering your dream space!
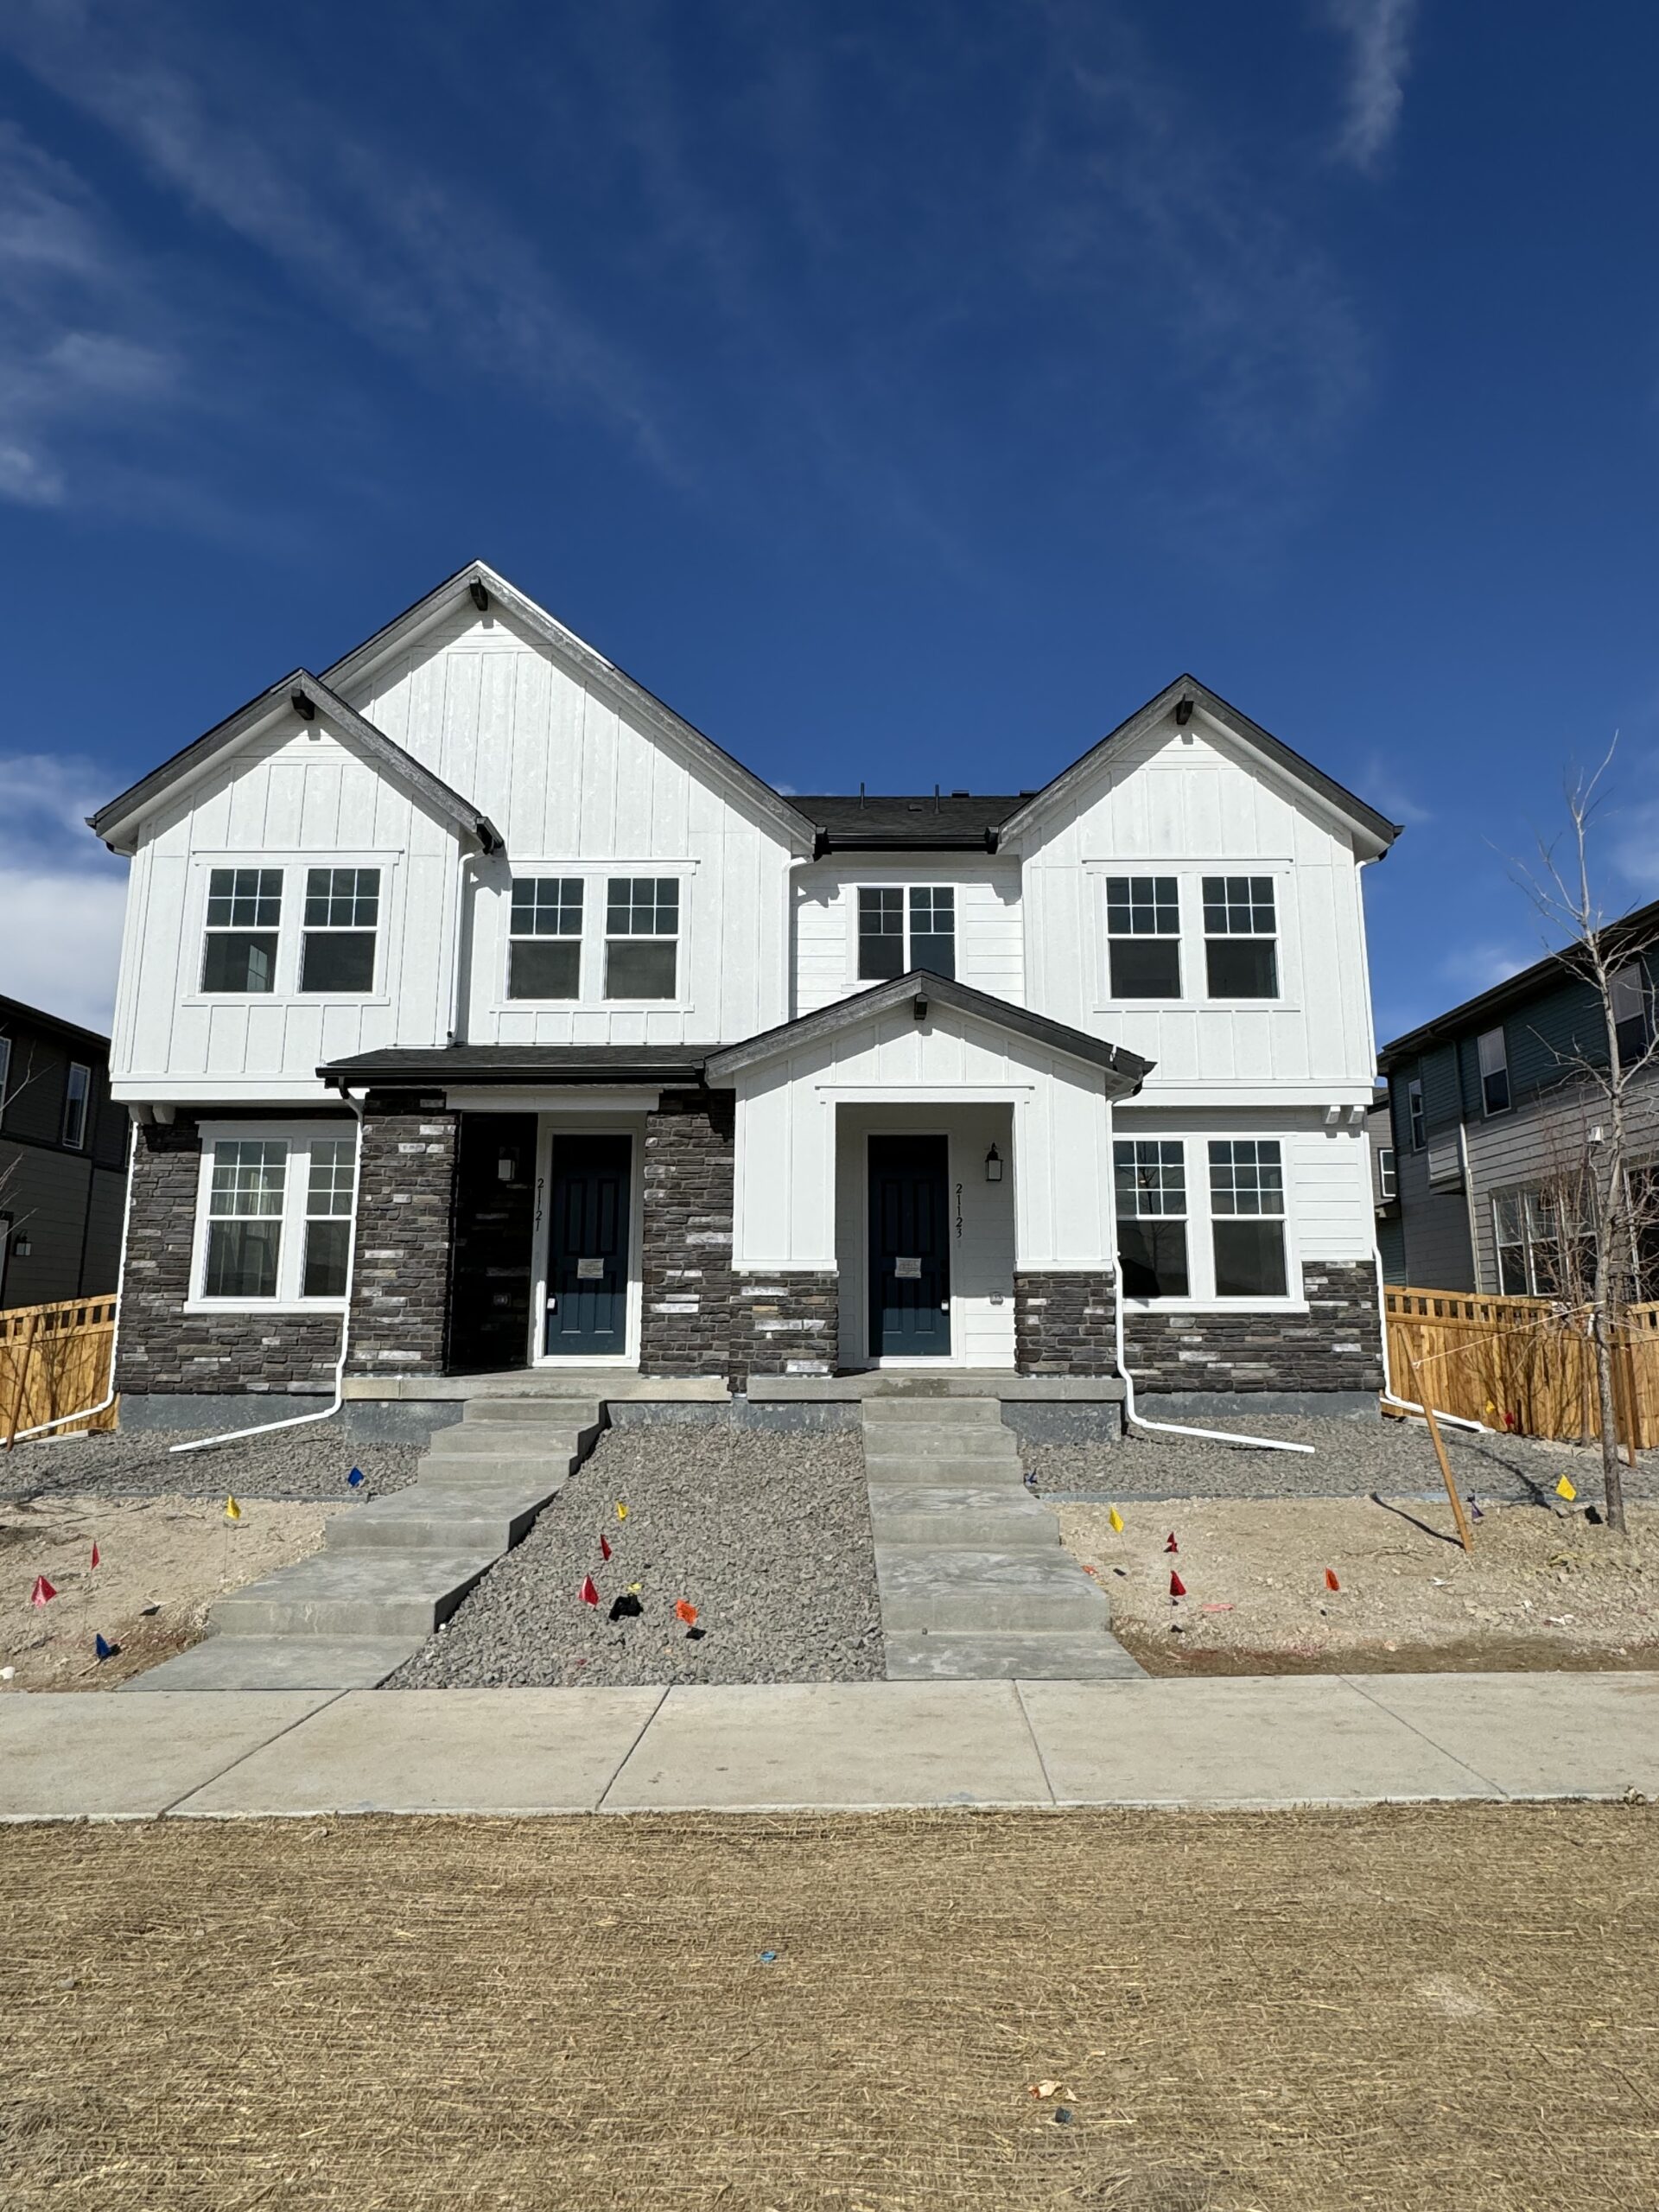
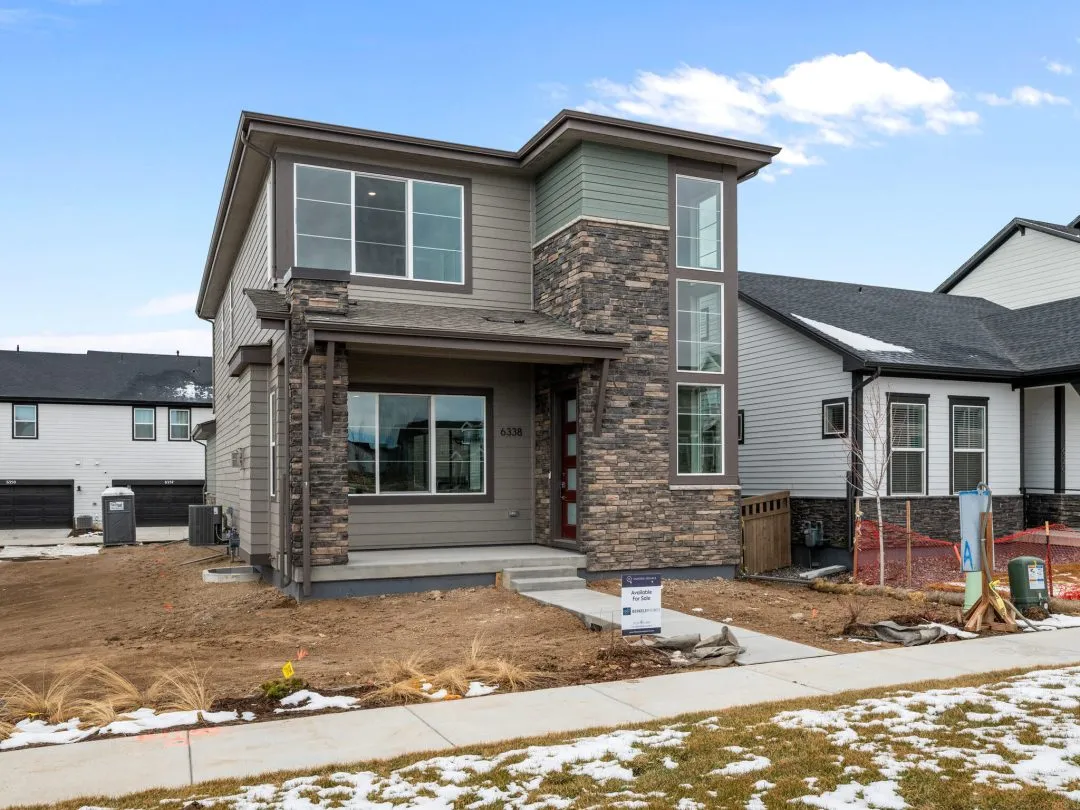
STEP 2 – VISITING THE MODEL HOMES
Alright, we’ve locked in the neighborhood you’re eyeing, and it happens to be in a fresh, new-build community—exciting stuff! Now, let’s dive into the smorgasbord of options waiting for us. Should we check out every model home? Well, it’s like this: if it’s a sprawling neighborhood like Painted Prairie or Aurora Highlands with a whopping 6-12 builders, we might not need to explore every nook and cranny. Right now, let’s laser-focus on what you’re after: 2-story or ranch; a cozy 3 bedrooms or a spacious 4; maybe an attached townhome or the standalone charm of a single-family home—just a sneak peek of the fun questions I’ll throw your way as we embark on this journey. What else makes your dream home sparkle? Contemporary or traditional vibes; what’s the sweet spot for your budget; are you all about customization or prefer to keep things simple? We’re diving into these questions and more when we step into those model homes. This is our time to chat, gather intel, and arm ourselves with all the info we need to rock this home-finding adventure!
STEP 3 – SIGNING THE CONTRACT

Exciting news – we’ve found the perfect house and are ready to bring our dream home to life! Cue the confetti and the happy dance! But hold on a sec – before we speedily sign that contract, let’s take a closer look. I know, contracts can be a bit daunting, some even clocking in at over 100 pages, but fear not, we’re not skipping any steps here.
Here’s the lowdown: builder contracts are like the builder’s playbook, crafted by their legal team to favor them. No need to fret, though – we’re here to navigate through the fine print. One major thing to note is the appraisal game. If the appraisal comes in a bit shy, the contract might put the responsibility on you to cover the difference. Sneaky, right? And here’s a kicker – builders can take up to 2 years to complete the home in Colorado, introducing a dash of interest rate risk. Imagine locking in a 6% rate and finding out it’s jumped to 7% by the time you close. Market surprises, anyone?
Let’s not forget about earnest money – usually in the range of $5k to $30k (or more if you’re going all out with customization). The catch? If you need to back out, the contract typically allows the builder to keep the earnest money. It’s a bit like a plot twist, but fear not, we’ve got it all covered.
The contract might seem non-negotiable, but don’t worry, we’ll make sure all your questions are answered, and our ducks are lined up perfectly before we dive into this exciting chapter!
STEP 4 – PRE-CONSTRUCTION MEETING
In our upcoming pre-construction meeting, we’ll be sitting down with both the builder and the sales agent to delve into the structural aspects of your future home. It’s important to note that the format of these meetings can vary among different builders, each offering a unique experience.
Beyond discussing the intricacies of the floorplan, the builder will present the plot plan, offering insights into the construction process. This comprehensive session covers a range of essential topics, starting with the analysis of the soils report—an examination of the composition of the ground. Additionally, the builder will outline the projected timeline for construction, highlighting any potential delays they anticipate. This is an opportune moment to address any questions or concerns you may have about the construction process and ensure that we are well-informed and prepared for the exciting journey ahead.
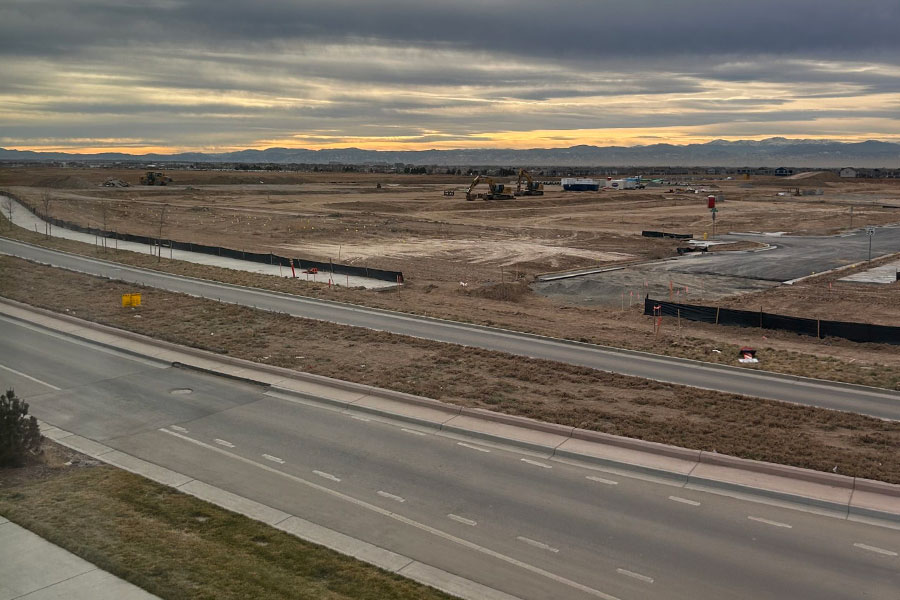
STEP 5 – PERMITTING

So, you’ve put pen to paper, all pumped up to watch your dream home rise from the ground. You swing by, and what do you see? A pile of dirt here, another one there, and a month later, still more dirt! What gives? Don’t worry, it’s all part of the magical journey of home construction and understanding the ropes can turn those dirt piles into exciting progress markers.
Here’s the lowdown: after signing the contract, the builder dives into the nitty-gritty by submitting permits to the city. Now, this step might take a bit of time, but fear not, we’re talking a maximum of 2 months, unless you’ve got some seriously unique features in the mix. These permits are the backstage passes to the structural dance of your home – think basements (finished or not), cozy fireplaces, outdoor gas lines, and a whole array of construction wizardry. It’s like laying the groundwork for the masterpiece that’s about to unfold!
STEP 6 – DESIGN CENTER

The design process varies from builder to builder, adding a unique flavor to the journey of creating your dream home. On one end of the spectrum, some builders offer full customization, allowing you to personalize every detail—from flooring and cabinets to tiles and more. Meanwhile, others present curated packages, where a professional has pre-selected designs, covering everything from flooring to backsplash.
Now, here’s where the excitement kicks in! When you’re building your home, you have the opportunity to shape it according to your vision. As an added perk for my new build clients, I go the extra mile by bringing in a professional interior designer to one of the appointments. This way, if you’re looking for a professional opinion or want to bounce ideas around, you’ve got an expert at your side. I’ll be there too, ensuring you have a seamless experience, offering recommendations based on what I’ve observed from other buyers in their quest for the perfect home. After all, building your home is a significant investment, and my goal is to help you make the most of it while you enjoy the process!
STEP 7 – FOUNDATION
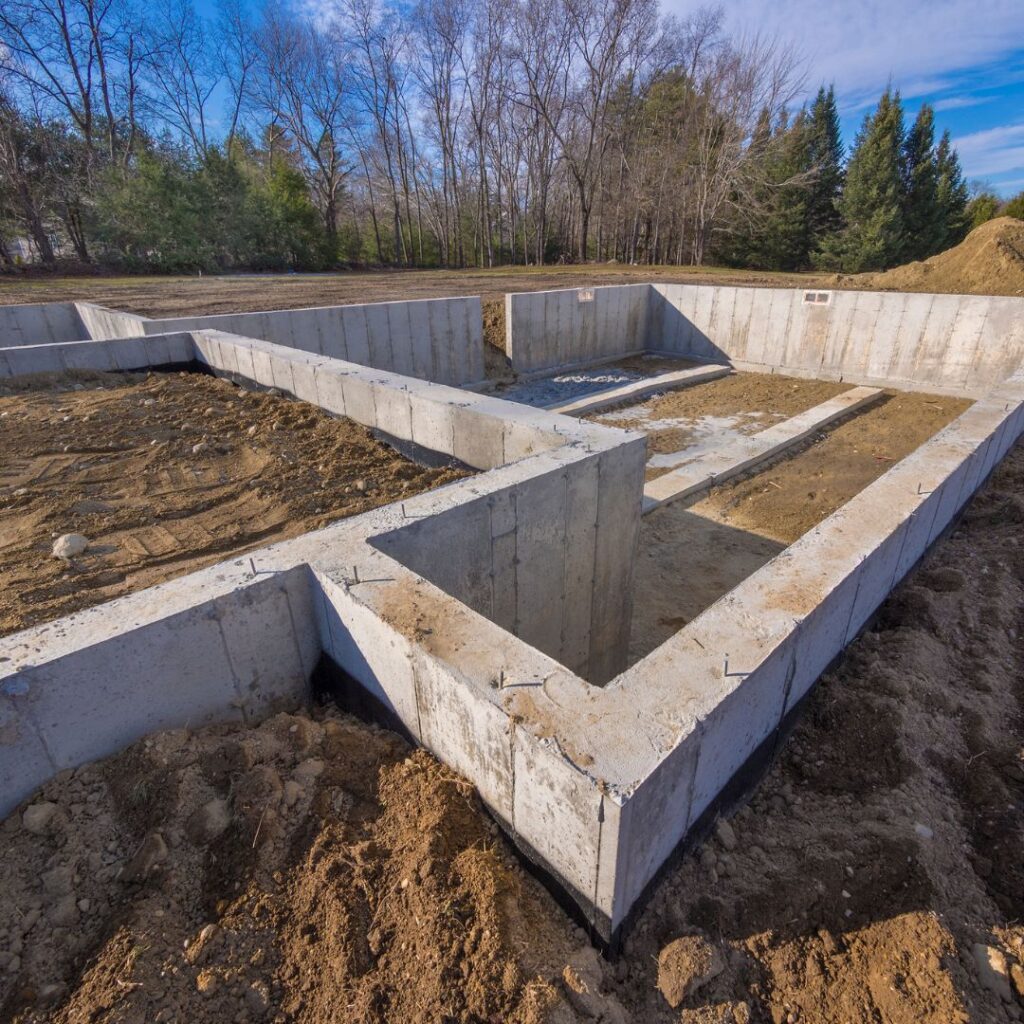
While it might not be the flashiest step, understanding the foundation is crucial in the grand scheme of building your home. Arguably, the foundation holds the title of the most vital element in any home construction project. Builders meticulously craft the foundation based on the findings of a soils report or geotechnical report.
Here’s the nitty-gritty: a third-party team examines the lot by boring into it, analyzing the composition of the soil. This information guides the construction of the foundation, dictating the specific approach needed based on the type of soil. We’ll delve into this aspect during our initial meeting with the builder, where the soils report will be on the agenda. If there’s anything we’re unsure about or want a second opinion on, we have the option to bring in third-party engineers to review the report.
The foundation-building process unfolds with the excavation of the lot, followed by pouring the footers—the concrete pads supporting the foundation walls. Subsequently, the basement slab and garage slab are poured into place. Once this intricate process is complete, we can opt for a third-party inspector to provide an extra layer of assurance. Think of it as having insurance for your foundation—sometimes they catch significant issues, and sometimes it’s smooth sailing. Generally, the foundation process spans about three weeks.
STEP 8 – FRAMING
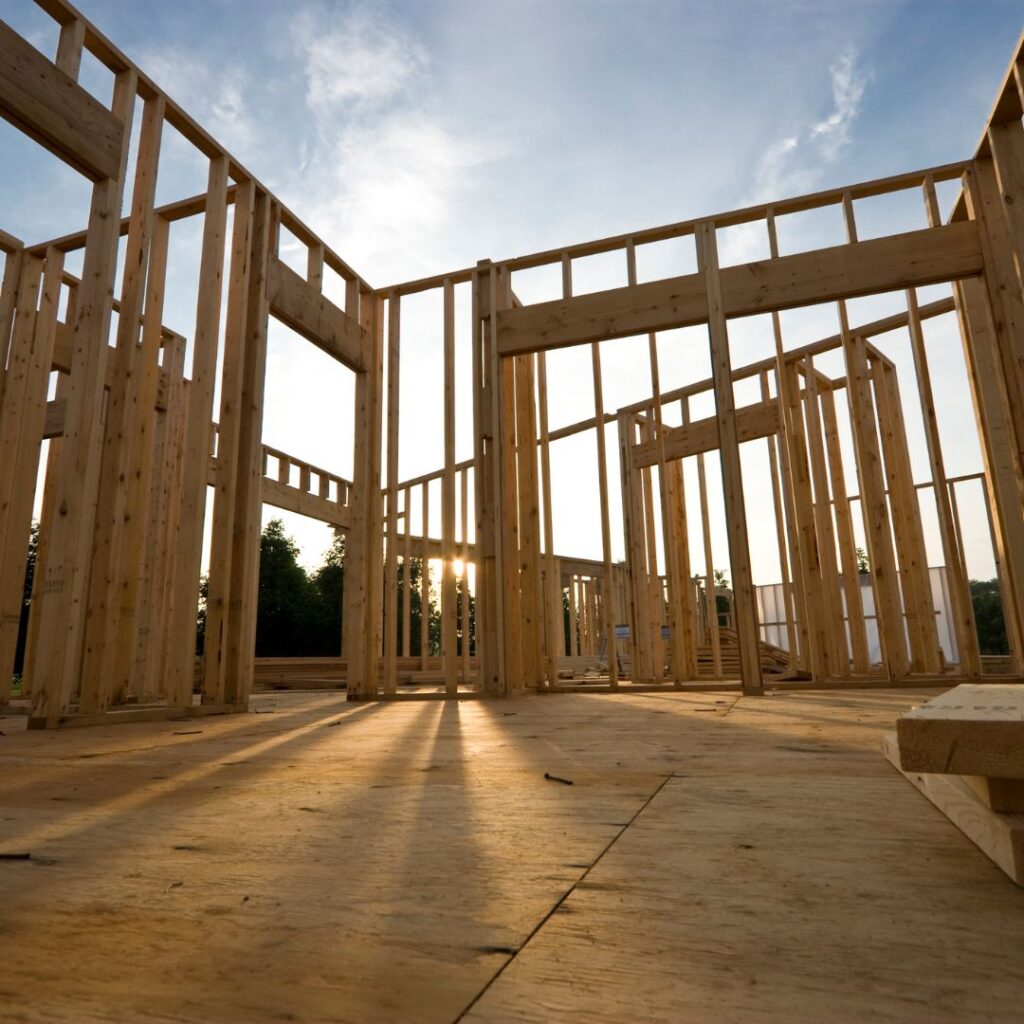
Time for the framing stage—personally, I find it utterly fascinating. It’s a speedy process, and like magic, you’ll witness the home taking shape right before your eyes. Typically, framing wraps up in about 5-7 days, and once it’s done, you get the exciting opportunity for a walkthrough.
During this walkthrough, we’ll ensure that all the structural elements are spot on—checking that the framing for the fireplace and other crucial components align perfectly. Now, a word of caution: safety first! The framing stage can be a bit precarious with open pits and nails poking out. If you’re eager to explore the inside, make sure to coordinate with the builder, and take necessary precautions.
Now, let’s address the age-old question: What if it rains during framing? Fret not! The type of wood builders use is designed to withstand moisture. So, if your home is rising in Colorado’s winter with its fair share of wet weather, rest assured—it won’t harm the home in any way. Building with resilience and excitement, come rain or shine!
STEP 9 – MAJOR SYSTEMS
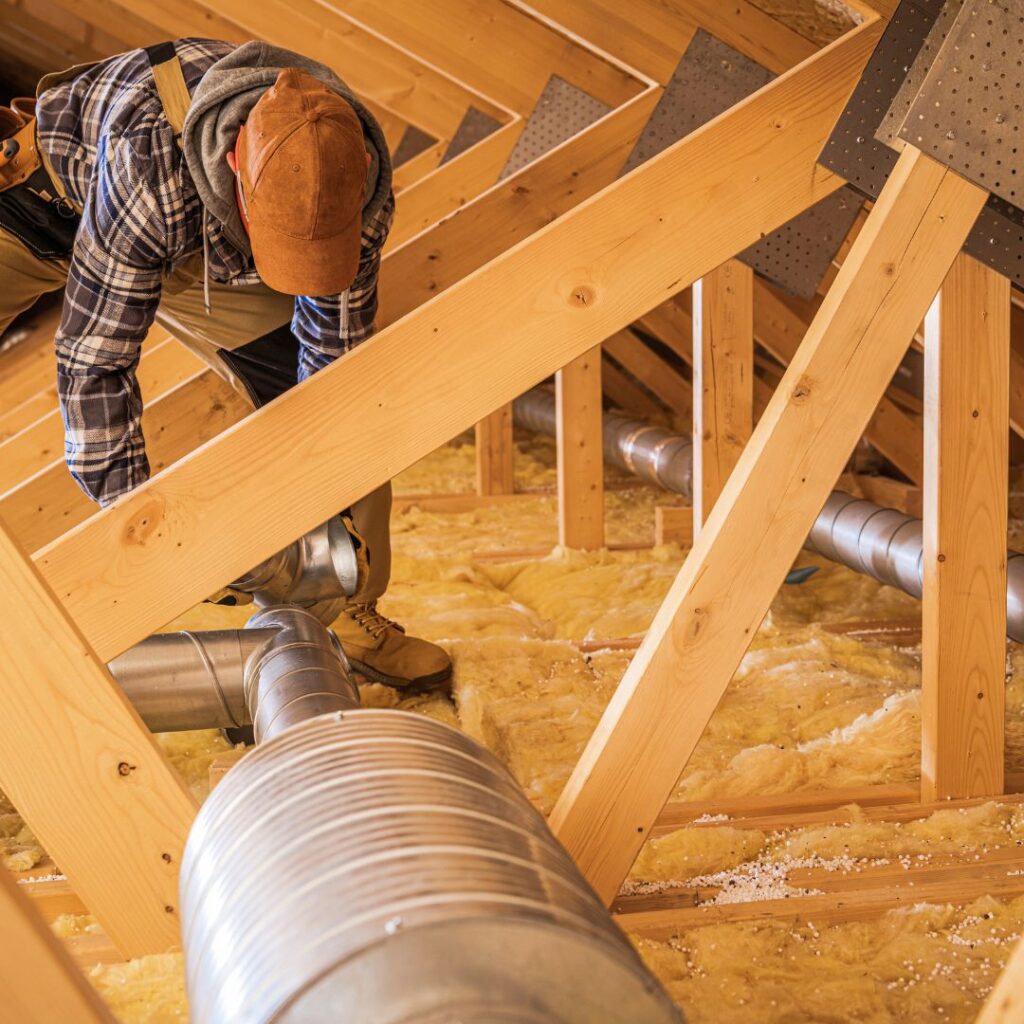
Now, let’s talk major systems, starting with the substantial tin ductwork for HVAC. This takes the lead in installation because of its size and space requirements. Once the HVAC setup is in place, the plumbing takes center stage, featuring the modern PEX piping—an alternative to copper, offering increased flexibility and cost-effectiveness. Following closely, the electrical components join the scene.
Here’s the deal: the priority depends on the size of the system. Larger systems get precedence at this stage. Plumbing and electrical work often occurs simultaneously, keeping the flow efficient. Simultaneously, they focus on sealing up the exterior of the home—windows, roof, the whole shebang. The goal is to get these structural elements in place before completing the electrical work. This intricate process unfolds over a span of about 4-8 weeks, ensuring a seamless integration of these crucial components.
STEP 10 – PRE-DRYWALL
Now that all systems are in place, it’s time for the crucial stage of city inspections. Every third-party inspector from the city needs to meticulously review and sign off on the entire setup—a step that can be a bit time-consuming. This marks the second phase where some buyers may feel a tad frustrated. The process typically spans from two weeks to a month as we ensure every inspector has thoroughly assessed and approved the home.
Here’s a thoughtful addition: to provide extra peace of mind, my clients have the option of bringing in an independent third-party inspector for an additional layer of scrutiny. During this phase, I also offer a complimentary pre-drywall 3D tour of the home—an invaluable resource for any potential future repairs.
Once we’ve crossed this inspection hurdle, we move on to a builder walk, where we meticulously check all the selections, including the positioning of low voltage and electrical components. This is a crucial meeting, and I encourage clients to bring the inspection report, ensuring we go through every detail with the builder to confirm that everything is in top-notch condition.
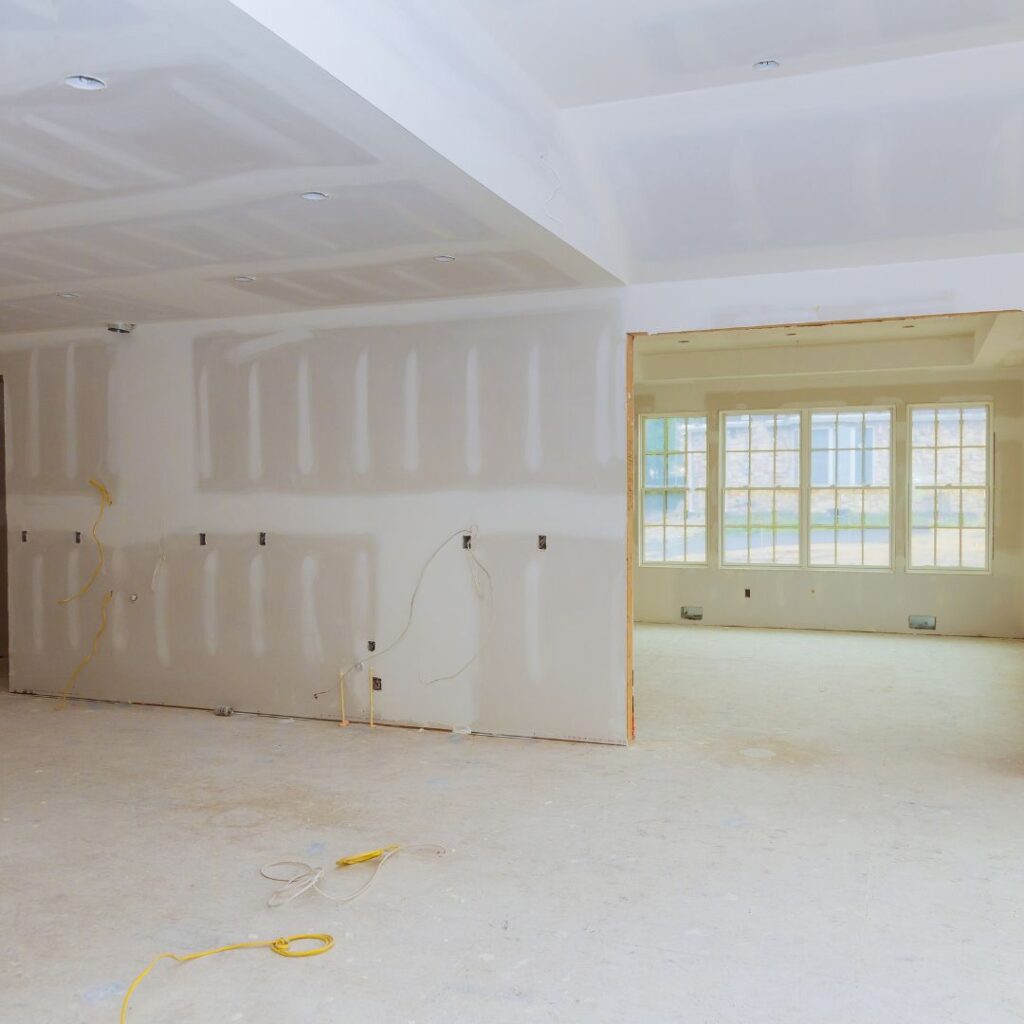
STEP 11 – INSULATION
The robust blow-in insulation we use packs a powerful punch, offering excellent “R” value and ensuring top-notch insulation for your home. It’s worth noting that builders typically focus on blowing in insulation for the exterior, not the exterior walls—a crucial detail to inquire about during our initial meeting.
Now, picture this: once the insulation is snug in place, the drywall takes center stage. This marks the transformative phase where the home truly comes to life. All those carefully chosen finishes from the design center start making their debut. It’s the moment you can bring in someone to measure for those perfect blinds you’ve been eyeing. We’re reaching the home stretch! The insulation and drywall process unfolds over about 3 weeks.
STEP 12 – FINISHING STAGE
Here comes the absolute thrill ride! The moment you’ve been eagerly awaiting has arrived—your dream home is about to burst with all the fabulous selections you made. Picture it: lighting that dazzles, countertops that steal the show, plumbing that’s as sleek as it gets, flooring that feels like a dream, and a paint job that sets the perfect tone. Every week brings a delightful surprise as something new adds to the tapestry of your home. Feel free to swing by regularly, especially on serene Sundays when construction is usually taking a break. Spot any mistakes? Don’t hesitate to let me and the builder know; after all, it’s all part of the process, and they’re committed to making things right.
Once those cabinets slide into place, we’re on the fast track, with about 45-60 days until the grand closing ceremony. The appraisal gets the green light, even if the home isn’t a 100% finished masterpiece—no worries, it’s a common dance step in the process.
As we approach the finale of this stage, we’ll team up for another walkthrough with the builder. Here’s a pro tip: consider a third-party inspection to catch any potential issues before closing day. Speaking of which, on the day of closing, we’ll take one more stroll through your nearly complete dream home. Will it be 100% finished? Probably not. There might be a backordered cabinet or a fashionable refrigerator playing fashionably late. Builders are generally rockstars at getting things done by closing, but if a couple of items need a final touch, we’ll stay on top of it post-closing to ensure your home is picture-perfect.
STEP 13 – CLOSING
Cue the celebration—it’s closing day! This momentous day kicks off with an exciting final walkthrough alongside the builder in the morning. After making sure everything is in tip-top shape, we’ll likely head over to the builder’s title company to officially close on your dream home and snag those coveted keys! Keep in mind, depending on the builder, you might need to swing by the post office to grab your mailbox keys. If that’s the case, the title company will provide an extra copy of the warranty deed that you can take to the post office to secure your mailbox keys. It’s the grand finale to your home journey—let the festivities begin!
STEP 14 – POST CLOSING
Since it’s a brand-new home, we might not catch every detail on the final walk, but here’s the fantastic news—builders provide a one-year warranty! Now, the specifics vary; some builders team up with third-party warranty companies, while others have their in-house warranty setups. Think of the one-year warranty as a comprehensive bumper-to-bumper coverage. Spot anything that needs attention during this period? Just give them a heads-up, and they’ll sort it out.
For an extra layer of reassurance, consider scheduling a third-party inspection around the 10-month mark. Share the findings with the builder, and they’ll ensure everything is spick and span before that one-year warranty wraps up.
Once you’ve crossed that initial year, you’re in for a treat with a 2-5 year mechanical warranty, covering major systems and mechanical elements. A pro tip: register all your appliances and major systems, as many manufacturers offer free extended warranties. Plus, you’ll likely have a sturdy 10-year structural warranty in place. If anything pops up with the foundation or structure of the home, rest easy—this warranty has got you covered!